Cold/Hot smoker in one

User avatar
el Ducko
Veteran
Veteran
Posts: 1340
Joined: Sun Dec 25, 2011 04:59
Location: Texas Hill Country
Contact:

"Cold" Smoking in Texas (smokegen technique review

Post by el Ducko » Thu Oct 04, 2012 21:47

Well, I got all fired up about venturi smokers, and went out and built one. Results (mixed) follow. I think I have a better way, sad to say. Those of you with venturi smokers, please comment. Mine needed help.

el Ducko
------------------------------------------
Cold Smoking in Texas

Yes, Virginia, there`s not only a Santa Claus, but it is also possible to cold smoke in Texas. Like Mr. Clinton said, though, "It depends on what your definition of `IS` is." By cold smoke, I mean, limiting smoke temperature to ten degrees or less above ambient temperature. If you time it right, though (start when it`s cool), you`ll do fine.

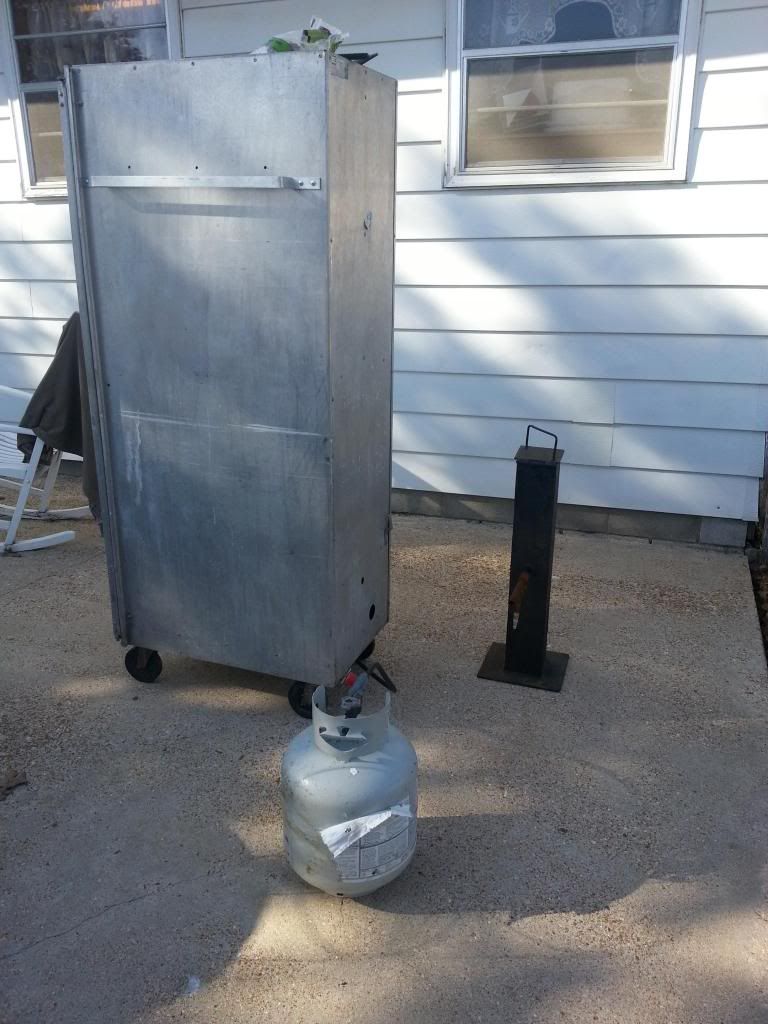
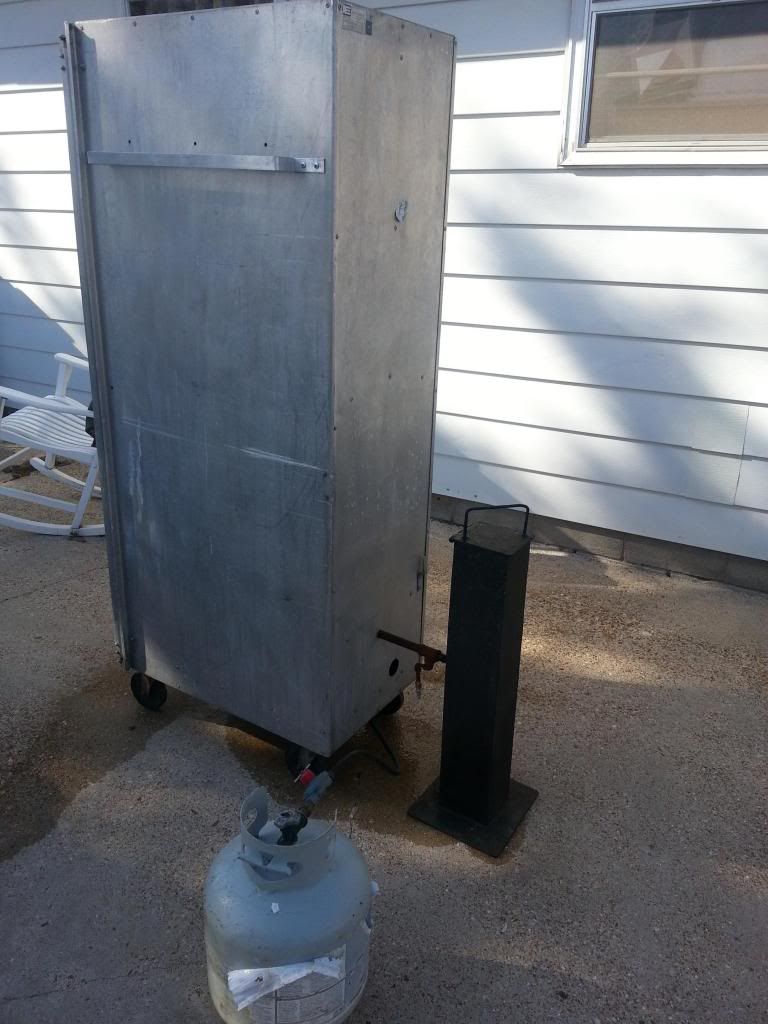
Smoker: I brought home a brand new "CookMaster by MasterBuilt" smoker from Bass Pro a few days ago. (Somebody spray-painted "CHEAP" on my pickup while I was double-parked, picking the thing up to save shipping, the bums.) I got it home, assembled it, hooked up the propane, filled the smoker chip box with cheaps, and turned it on as low is it would go. The result- - couldn`t get it below about 230 deg.F, no matter what I did. This is fine for brisket, maybe, but not for cold smoking.

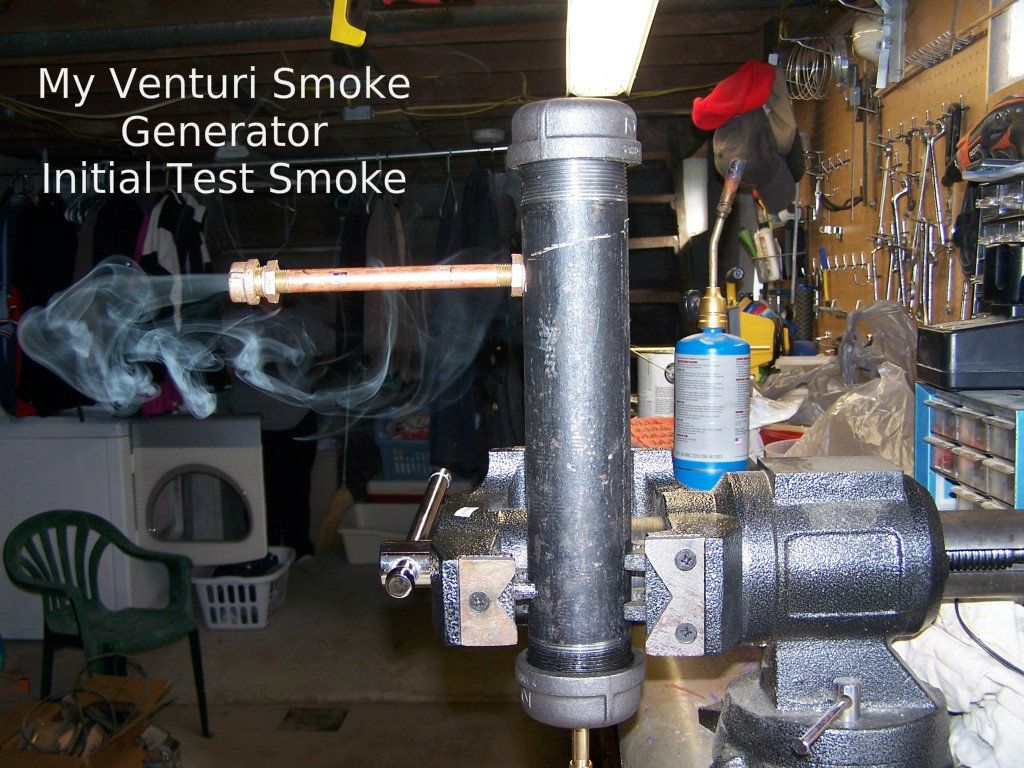
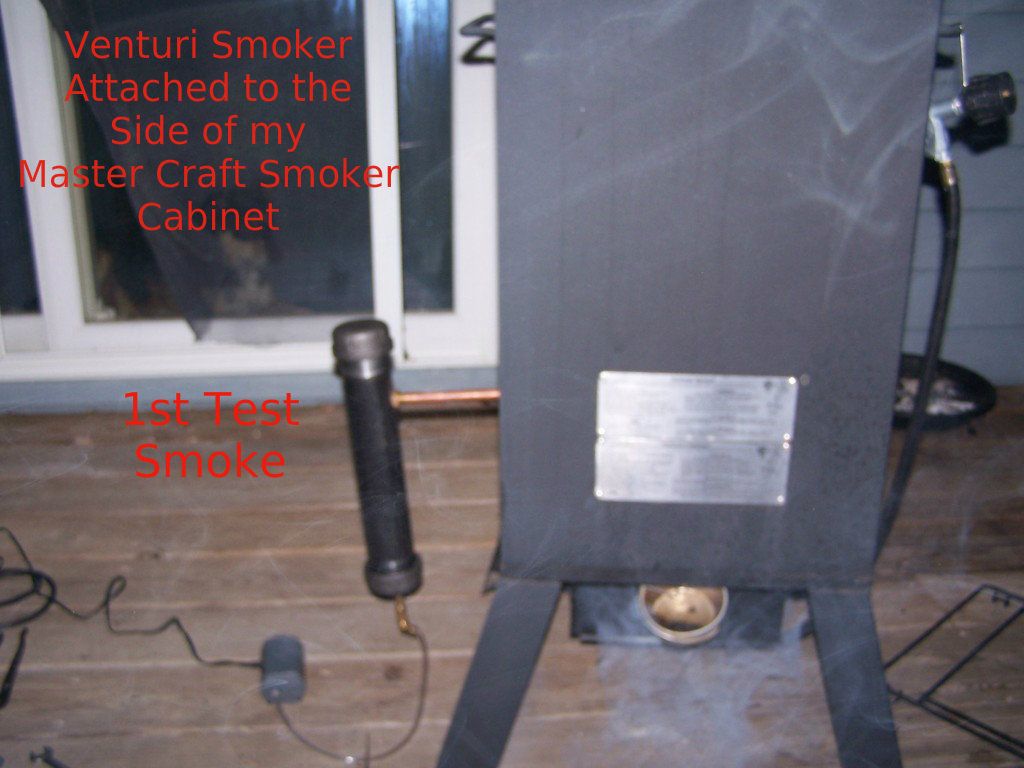
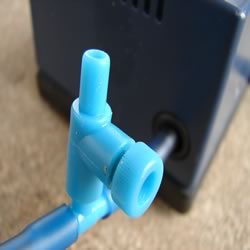
Venturi Smoker: After consulting you fine folks on Wedliny Domowe, I visited the aquarium store and the hardware store and bought makin`s for a venturi smoker. Being a retired engineer, I looked up how a venturi works, and kept muttering mantras to Mssrs. Joule and Thompson as I assembled the thing. The body is a 1/2" by 1/2" by 1/2" PVC tee. For the straight run inlet, I drilled a hole in a cap to accept 1/4" copper tubing, and hooked the aquarium air pump`s discharge tubing to it. For the straight run out, I inserted a union, threaded on one side to accept a barb fitting, and ran some 5/8" tubing up into the base of my smoker. For the tee`s side inlet, I threaded a union and attached an upside down 16 ounce soup can. The open top, now bottom, could be filled with wood chips. I bent a piece of metal mesh gutter cover to hold the chips in.

I discovered several things while tinkering with it.
● Don`t fill the can more than half way. The pressure drop through the chips is too high, so they go out instead of smolder.
● Venturi operation depends on having a good, high air flow that makes up most of the volume of gas going through the venturi. My aquarium pump wasn`t up to the job. I tried several positions with the copper tubing and settled on one which was up inside the barbed discharge fitting, taking up about half the available cross sectional area. It moved smoke, but not enough to satisfy me.
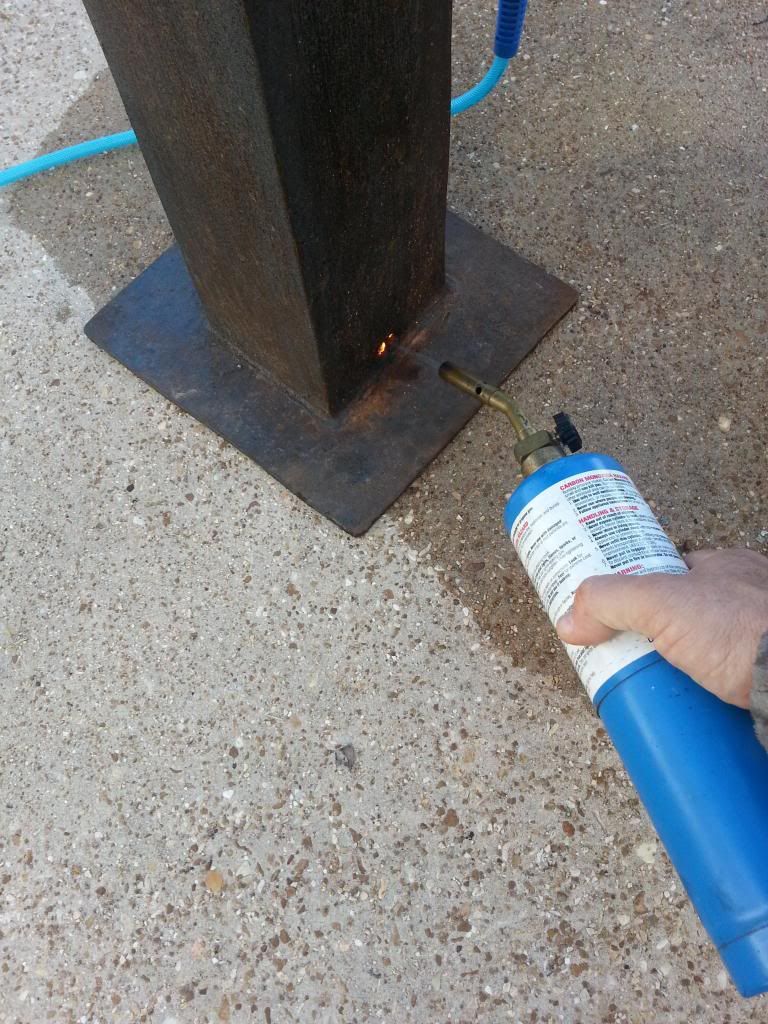
● Use an electrical hotplate to supply heat for the chips. I first tried a butane lighter, but couldn`t get it to catch. Next I tried a propane torch, and it caught, alright. I dropped the hot can and it nearly caught everything on fire. Finally, I used a hot plate. ...a good, high-powered one. Steady heat supply means steady smoke supply. Once the chips in the can start smoldering, the power can be cut off, but it will be needed again before long. Might as well keep it on.

Smoke lasted about 3-1/2 hours. Smoke volume was low. Conclusion: disappointing.

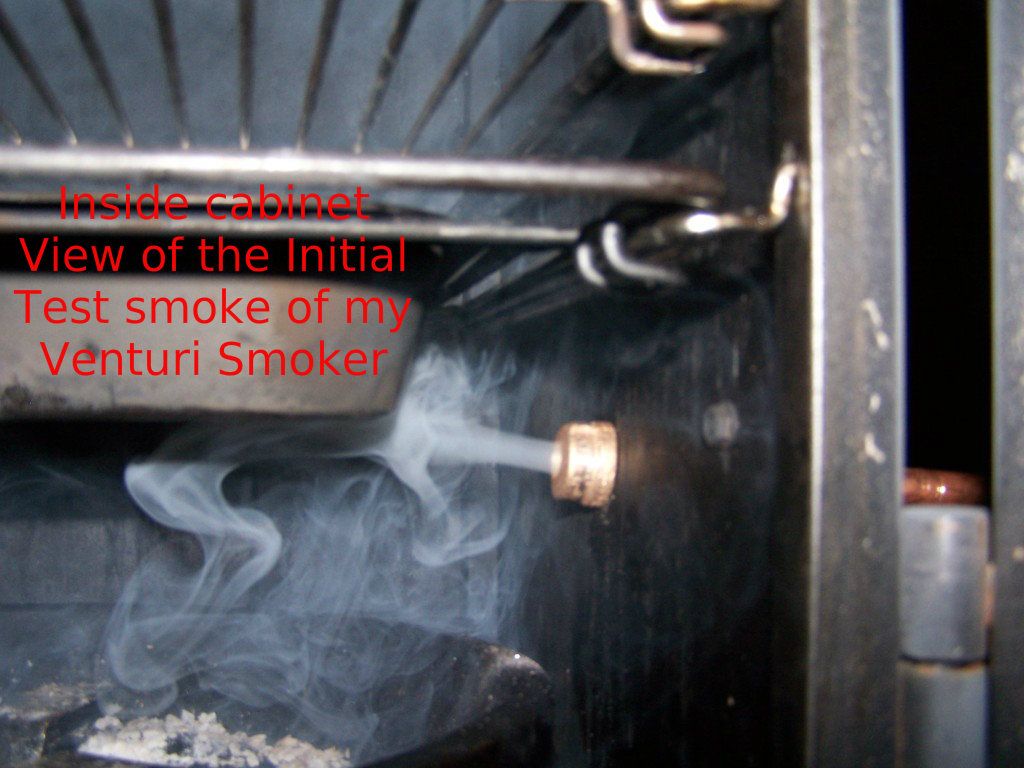
Inside Smoke generator: This time, I held the soup can right-side up. I installed a barbed fitting in the bottom, to accept the aquarium pump discharge tubing. I drilled two more 1/2" holes so I could light the chips. I threaded the tubing up through the burner opening in the bottom of the smoker, attached the can, lit it (required a butane torch), and closed the door.

To make a long story short, this option required much fumbling with the can to keep it lit. There was no way to put the can on the hot plate, because of the location of the air tubing. Smoke temperature climbed beyond 20 degrees above ambient, which was unacceptable. Removing the tubing, I could use a hot plate, but the smoke temperature soared.

A-Maze-N Clone: I folded some aluminum foil into a sort of "M" shape, and tried to imitate the Amaze-N- Smoker. These things sell for $50, and you have to buy sawdust or special pellets. Being somewhat cheap, I tried to generate my own wood dust by grinding chips in my spice grinder (former coffee grinder). It nearly destroyed the grinder, made dust out of some wood and didn`t do much to the rest of the chips... I tried burning both wood dust and shredded chips in the aluminum. Even with the butane torch, I couldn`t keep it lit, let alone generate any smoke. I concluded that
● I couldn`t clone it, and
● The for-sale version is expensive, plus it ties you to their wood supplies.

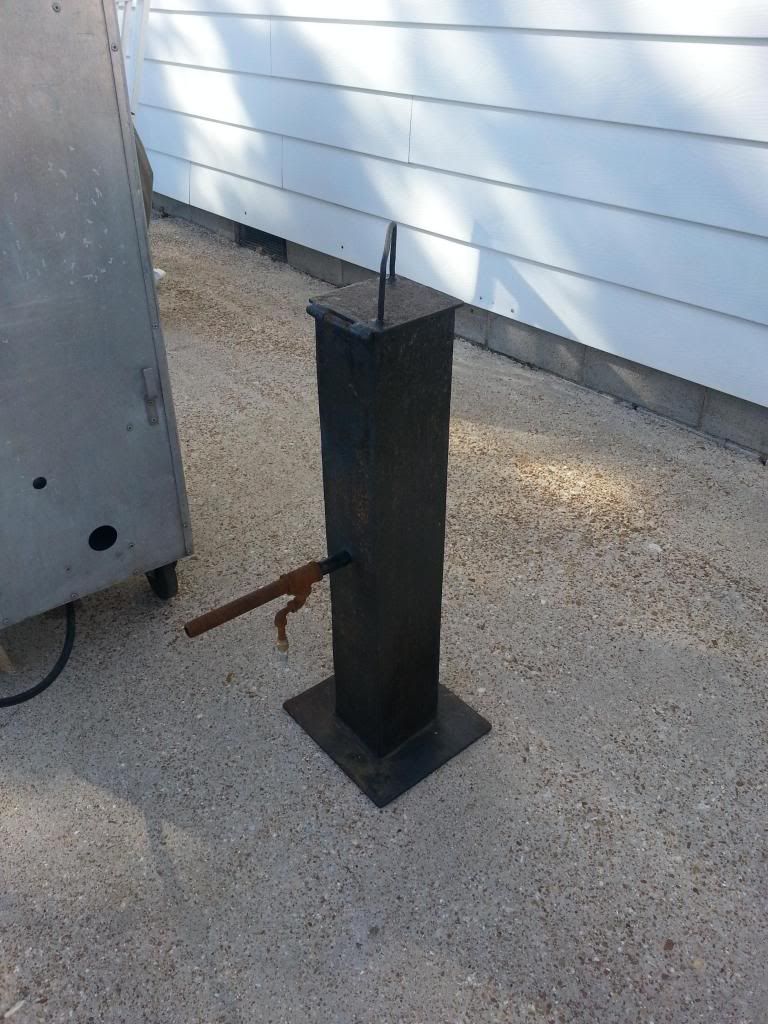
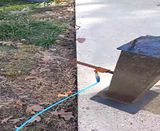
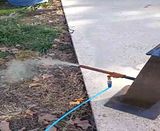
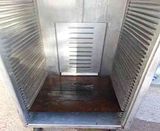
External Smoke Generator: Stan Marianski`s books talk about external smoke generators for smoke houses. Clearly, I needed smoke generated outside my smoker, and some means of cooling the smoke. For my first attempt, I tried the "can of chips on a hot plate" smoke generator, and mounted a funnel in the opening on the bottom of the smoker where the grease cup is supposed to go. It worked pretty well, although only about half the smoke went up the funnel.

I remembered some of Ssorlih`s posts. Ross outlined a smoke generator which channeled smoke through a downspout to his smoker. I also remembered several references to Alton Brown`s cardbox smoker episode on the television show, "Good Eats."

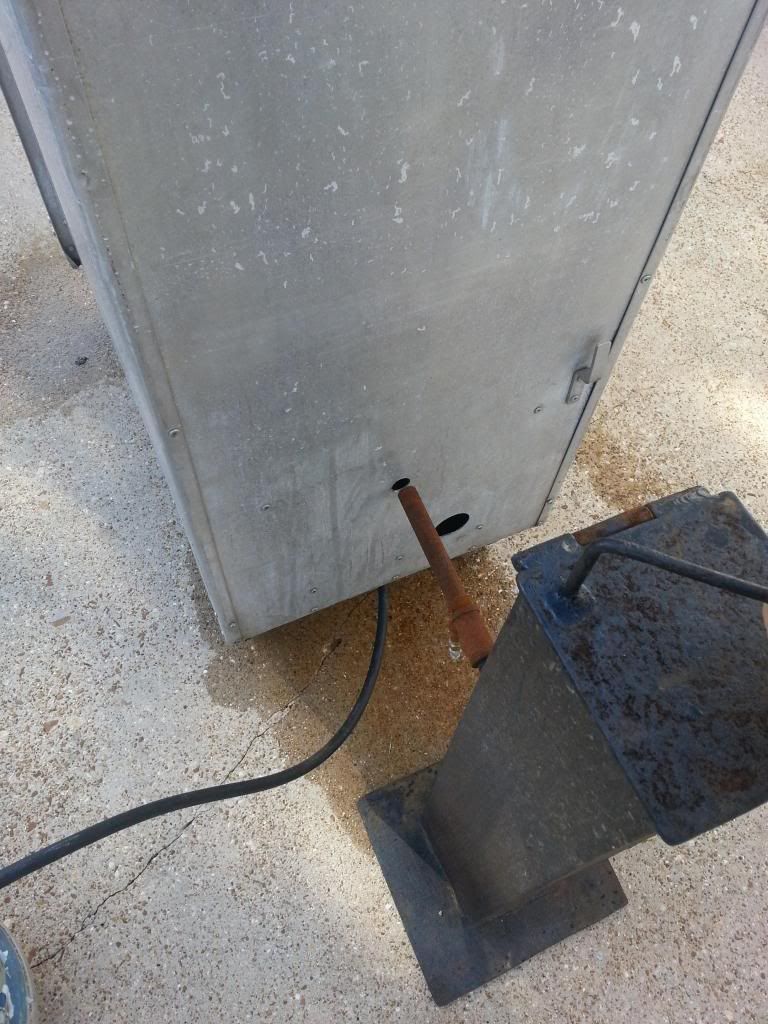
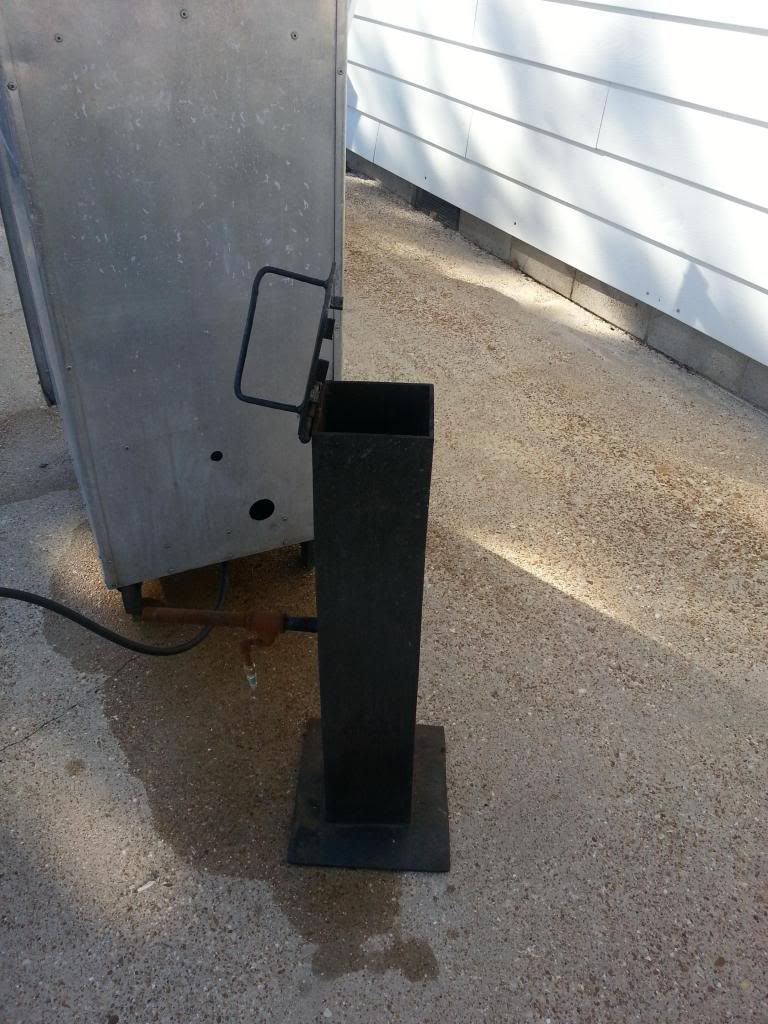
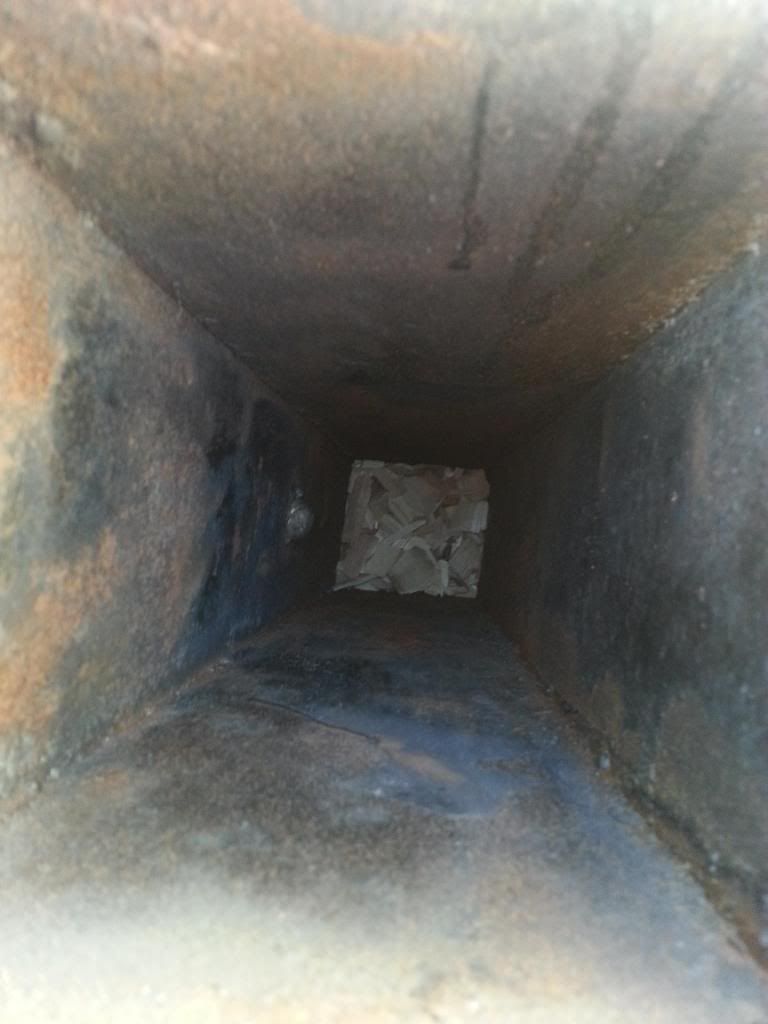
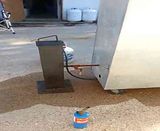
This time, I have the wood chip box that came with my smoker, seated on an electric hot plate, covered by a cardboard box. A hole in the side, high up, accepts one end of a ten foot aluminum downspout. The other hooks into a 90 degree "flat" elbow to go sideways, then a 90 degree elbow to go up. I connected that elbow to the smoker by attaching an oval downspout clip (whatever it`s named?), and used a Radio Shack "nibbling tool" to chew a larger opening where the grease cup hangs. Smoke goes from the box, up the downspout (where it cools), up into the smoker. Thanks to running the hot plate continuously, I need only shake the wood chip box once an hour, add chips every 2nd or 3rd hour, and can smoke all I need. ...but only if I start early in the day. Texas afternoons still are hot. (It won`t be long, though, until they`ll be too cold.)

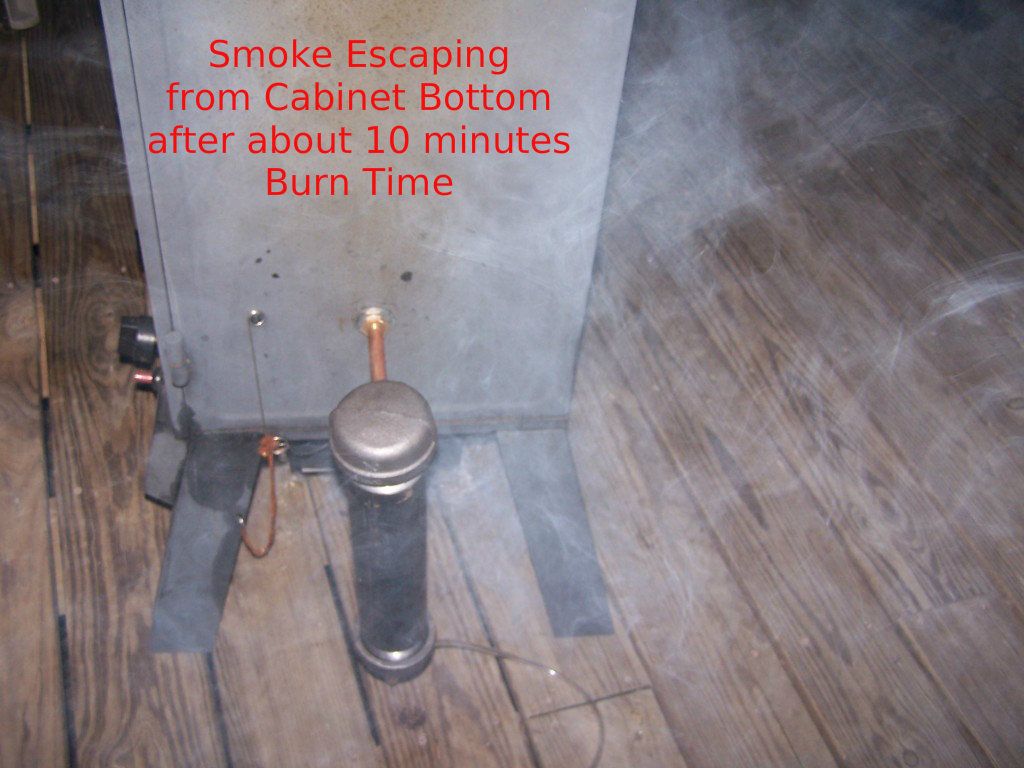
One other nicety- - Gulyas suggested that a chimney was necessary, and the gusty local winds occasionally blew smoke downward and out the bottom burner opening, rather than letting it go out the vent on the back of the cabinet (near the top). I used an old piece of sheet metal to construct a squared-off wind baffle, which solves the problem nicely.

"Cold" Smoke: So there you have it- - a "cold" smoker that consistently runs only five to eight degrees above ambient for hours at a time. It`s working great on "Project B" casbaii, which requires four` days of smoking. I smoke for four hours a day, beginning mornings, which leaves plenty of time for other chores.

...or not.
:mrgreen:
Experience - the ability to instantly recognize a mistake when you make it again.
User avatar
jbk101
Passionate
Passionate
Posts: 208
Joined: Thu Mar 31, 2011 16:49
Location: Versailles, Indiana

Post by jbk101 » Fri Oct 05, 2012 03:07

Hello all,
I just finished my homemade version of a Venturi type Smoke Generator :grin: I did a test smoke on it and so far I think it will work just fine. I used 2 inch Diameter Black Pipe and Black Pipe Caps on each end. I drilled a hole into the bottom cap and mounted a 1/4 inch brass pipe with some compression fittings to allow me to mount my air line on it and am using a cheap (Walmart) Aquarium air pump as my air supply!
I drilled a hole near the top and mounted a 1/2 Inch Brass Pipe near the top and drilled a hole in my cabinet to mount the unit to the cabinet and the tube allows the smoke into the cabinet. The best Part I have about $35.00 invested into parts.
Here are some pictures:

Image Image

Image Image

I still need to make a couple of modification (Stainless Steel Screen) and maybe a larger Air Pump that has adjustable air flow. But as it sits I believe I can Cold Smoke now :grin:
Gulyás
Passionate
Passionate
Posts: 459
Joined: Sat Aug 18, 2012 19:58
Location: Wisconsin

Post by Gulyás » Fri Oct 05, 2012 03:11

Very nice. What matters is, that it works good.
Failure to prepare is preparing to fail.
Gulyás
Passionate
Passionate
Posts: 459
Joined: Sat Aug 18, 2012 19:58
Location: Wisconsin

Post by Gulyás » Fri Oct 05, 2012 03:15

Hey el Ducko.

I'm happy it works O.K. :wink:
Failure to prepare is preparing to fail.
crustyo44
Veteran
Veteran
Posts: 1089
Joined: Tue Jun 14, 2011 06:21
Location: Brisbane

Post by crustyo44 » Fri Oct 05, 2012 08:03

Hi,
If all you manufacturers of venturi type smoker attachments would have studied the New Zealand model on You Tube, you would have noticed that the air is pumped into the tube that goes into the smoker, no resistance from chips, sawdust or small chunks of wood at all.
The distance from the venturi jet to the burning sawdust/chips is no more than 3 inch, depending on the model.
Mine runs on a small 2 speed aquarium pump extremely well for 12 hours or more. Start with the high speed untill everything burns and smokes well and than reduce it.
Regards,
Jan.
User avatar
Chuckwagon
Veteran
Veteran
Posts: 4494
Joined: Tue Apr 06, 2010 04:51
Location: Rocky Mountains

Post by Chuckwagon » Fri Oct 05, 2012 09:46

Wow Big John,
That's incredible. Very nice indeed!
It put mine back in the dark ages. :roll:

Best Wishes,
Chuckwagon
If it looks like a duck, walks like a duck, and quacks like a duck, it probably needs more time on the grill! :D
User avatar
jbk101
Passionate
Passionate
Posts: 208
Joined: Thu Mar 31, 2011 16:49
Location: Versailles, Indiana

Post by jbk101 » Fri Oct 05, 2012 15:20

Crustyo44
crustyo44 wrote:If all you manufacturers of venturi type smoker attachments would have studied the New Zealand model on You Tube
Post or send me the link or post pictures of yours as I would like to see the version that you are taking about. I searched the Web and came up with this design as being the easiest to build.

The version that I considered making would be made with Schedule 40 aluminum and fence post caps. But as cost was a factor Black pipe (aka Gas line pipe) threaded by the store and pre made caps along with some copper tubing and compression fittings and a drill was the easiest and currently the most cost effective for me. I choose a cheap air pump ($6.77 at Wally World) but plan on getting one with an adjustable airflow so I can control the amount of smoke etc. But as always the design was basic and I am always looking for better ways of doing it and modification to this model would/should be fairly easy. So shoot them Ideas my way would love to hear and see them if anyone wants to share.

Thanks,
John
User avatar
el Ducko
Veteran
Veteran
Posts: 1340
Joined: Sun Dec 25, 2011 04:59
Location: Texas Hill Country
Contact:

Post by el Ducko » Fri Oct 05, 2012 17:24

crustyo44 wrote:...you would have noticed that the air is pumped into the tube that goes into the smoker, no resistance from chips, sawdust or small chunks of wood at all.
The distance from the venturi jet to the burning sawdust/chips is no more than 3 inch, depending on the model.
Jan describes a true venturi smoker. What jbk101 describes passes air up through the chips, vertically. This isn`t a venturi, but rather, an air-fed, fixed bed smoker.

But, know what? Nobody cares! It`s smoke production that counts.

My own efforts got something that makes smoke, as did those by Crusty and JBK. My venturi version needs more work. So does my fixed bed version. My "chips in the pan" version works for now, but I`m gonna keep on trying both other types. What I want is controllability, which both Crusty`s and JBK`s improve upon. I like that! :mrgreen:
Experience - the ability to instantly recognize a mistake when you make it again.
crustyo44
Veteran
Veteran
Posts: 1089
Joined: Tue Jun 14, 2011 06:21
Location: Brisbane

Post by crustyo44 » Fri Oct 05, 2012 21:30

Hi John,
The best way to look at these models is to go to smokemate.blogspot.com. Ventura.
or on You Tube, look up Ventura smoke generators.
What I like the best of these models is that the air is fed in the tube going in the smoker, you start the fire in the bottom part of the hopper where there are 2 holes for an air intake.
So actually the air/smoke is not pushed through the whole lenght of the hopper upwards before it can exit into the smokehouse and does not require a powerful airpump.
I could have made one myself as I have all the equipment available but time was at a premium so decided to buy one from Alec Upfold.
His workmanship is beyond any doubt, his units are cheap as well if you take the exchange rate into consideration.
Hope this helps.
Regards,
Jan
User avatar
atcNick
Passionate
Passionate
Posts: 373
Joined: Fri Jan 01, 2010 05:17
Location: Texas, USA

Post by atcNick » Sat Oct 06, 2012 14:29

crustyo44 wrote:Hi Nick,
The easiest way to combine cold and hot smoking in 1(one) smokehouse is to use a venturi smoker.
I have used one for a number of years and I have bought a new one from New Zealand awhile back, all stainless, aquarium air pump powered, you can regulate the smoke amount entering the smokehouse by varying the air pressure.
We live in a hot and humid climate and I found this the easiest way to do it.
If you need to hot smoke, rig up an electric hotplate to provide heat, wire this up to an electronic temperature controller and voila you've got it.
Good Luck,
Jan.
Part of the fun for me is playing with fire. Ideally, Im looking for an all wood fired cold/hot smoker
-Nick
Custom R&O Smoker
Cedar Smokehouse
Weber Performer
Weber 22.5" One Touch Gold Kettle
Weber 18" WSM
Weber Smokey Joe
Lang 84 Deluxe w/chargriller SOLD
Cinder Block Smokehouse RETIRED
User avatar
Baconologist
Passionate
Passionate
Posts: 385
Joined: Fri Apr 06, 2012 00:37
Location: Oxford, New Jersey

Post by Baconologist » Sat Oct 06, 2012 15:50

jbk101 wrote:I choose a cheap air pump ($6.77 at Wally World) but plan on getting one with an adjustable airflow so I can control the amount of smoke etc.
You can adjust the air flow by simply adding a valve to the air line to exhaust a portion of the air before it reaches the smoke generator.

Image

I made a generator with black iron pipe much the same as yours and I still tinker with it on occasion...I also have a Smoke Daddy, but when I found out how great the A-Maze-N smokers work, I lost a almost all enthusiasm with other designs.
Godspeed!

Bob
Gulyás
Passionate
Passionate
Posts: 459
Joined: Sat Aug 18, 2012 19:58
Location: Wisconsin

Post by Gulyás » Sat Oct 06, 2012 21:16

Looks like this ventury smoke generator works good, and much cheaper than my bradley.
Failure to prepare is preparing to fail.
User avatar
jbk101
Passionate
Passionate
Posts: 208
Joined: Thu Mar 31, 2011 16:49
Location: Versailles, Indiana

Post by jbk101 » Sun Oct 07, 2012 07:52

I will be giving it its maiden voyage later today as I will be giving my Csabi its first round of smoke.

The Wally World air pump I think just doesn't have a strong enough air flow that I think a slightly larger and better equipped pump would.

I have a valve that I could install - but since I am going to get a bigger pump the adjustable air feature would be part of it for around $20.00.

I will report on how the Csabi day one smoke progresses
John
User avatar
el Ducko
Veteran
Veteran
Posts: 1340
Joined: Sun Dec 25, 2011 04:59
Location: Texas Hill Country
Contact:

Post by el Ducko » Sun Oct 07, 2012 15:22

Crustyo44 and I have been corresponding via PM, and he's told me more about his "Ventura" venturi setup. Thanks to him, I tried something that really helped.

My smoker setup consists of a hotplate with a chip pan on it, a cardboard box over that, and an aluminum downspout conducting smoke and air up to the bottom of a Cookmaster smoker. What I did to get some venturi effect is run a 1/4" copper tube connected to an aquarium air pump through the cardboard box and into the inlet of the downspout. This gives some motive force, moving air/smoke from the box up into the smoker cabinet.

It works well. :mrgreen:

Next problem: how to improve the generation of smoke. :neutral: The batch of chips in the chip box all char at the same rate, so you get heavier smoke at the start, tapering off. I open the cardboard box up after 45 minutes or so, shake the chip box, close things up again, and get more smoke, but it tapers off rapidly. After 1-1/2 to 2 hours, I dump what's left from the chip box and start with fresh chips.

It would be better to have a flame front moving through a bed of chips, with the ash falling out of the way. You would get steady smoke quality, and could add chips to the inlet as needed. You would no longer need the hot plate, but would lose smoke due to combustion requirements. As long as air moves across the face of the burning chips (hopefully from the bottom, rather than migrating upward through the bed), pressure drop would remain low and constant, and things should operate stably. ...just like the Ventura rig.

Thoughts...?
:mrgreen:
Experience - the ability to instantly recognize a mistake when you make it again.
huckelberry
User
User
Posts: 97
Joined: Tue Sep 25, 2012 18:37
Location: Arkansas

venturi Hot/Cold smoker

Post by huckelberry » Thu Dec 20, 2012 07:40

I took a couple of videos and some pics. of the smoke generator and smoking cabinet I built. I hope this will help anybody who has questions, it works really well and the nice part is I can hot or cold smoke with it. In the bottom of the cabinet I have put a propane burnner and venting to allow for hot smoking.
Image
This is the venturi smoke generator unit I built for cold smoking, it is made of some scrap metal that we had on a job I worked on, and the fittings were purchased at a big box store for not very much. I have it set up so I can just slide it in or out of the back of my smoke cabinet (an old proofing cabinet). That way I can stow it inside the cabinet when I am done with it. The generator is 5"x5"x24" and when you fill it with chips it will smoke forever.
Image
Image
Image
Image
This photo is to give you an idea of the volume of the chamber I put a full bag of wood chips that you can buy at Walmart in it and there is still room for a few more bags = (LOTS OF SMOKE).
Image
Small hole at the bottom to allow the air to draw through to the venturi. I just use a propane torch to lite it.
Image
This is a video to show how well it works even with less than 1psi air suply.
Image
This is with a little more air but still very little. It was less than 5psi prob. about 1psi or 2psi but hard to tell on my compressor guage at such low pressure.
Image
As you can see the more air you put to it, the more smoke you create.
This video shows how fast you could fill a smoker with this type of unit.
Image
This video is to show you if you want to figure the flow rates you can make a unit like this work very well without an air supply, if you have enough of a differance it the height between the smoke gen. and the smokers venting you will get some natural draw. I had to let it run for about 20 min. without the air suply to get it to fill the cablinet with smoke but it is just to show that it can be done.
Image
I hope it helps anyone who may be thinking about building their own. I do like my setup though, everything can be stowed in the cabinet when not in use and the cabinet is on wheels so it can be easily moved in to storage. Anyway good luck, I'm sure what ever you decide to do you will have a lot of fun making it work. Besides that is the fun with any project. Isn't it?
Don't take life to seriously.
You're not getting out of it alive!
Post Reply