Posted: Fri Dec 28, 2012 02:07
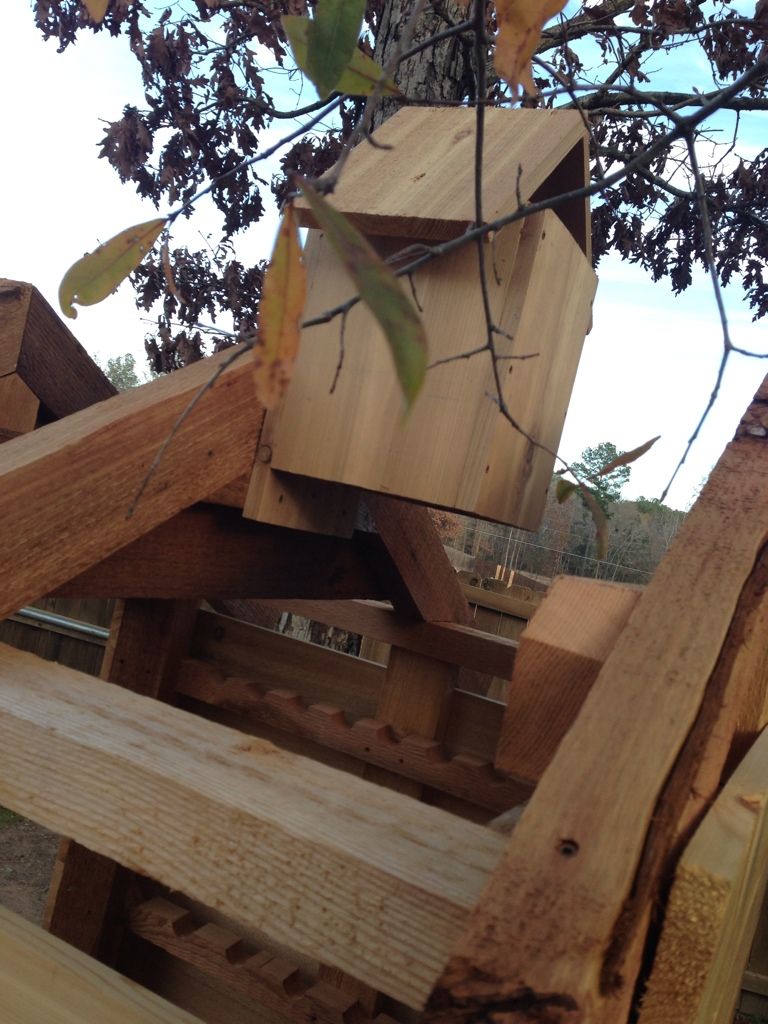
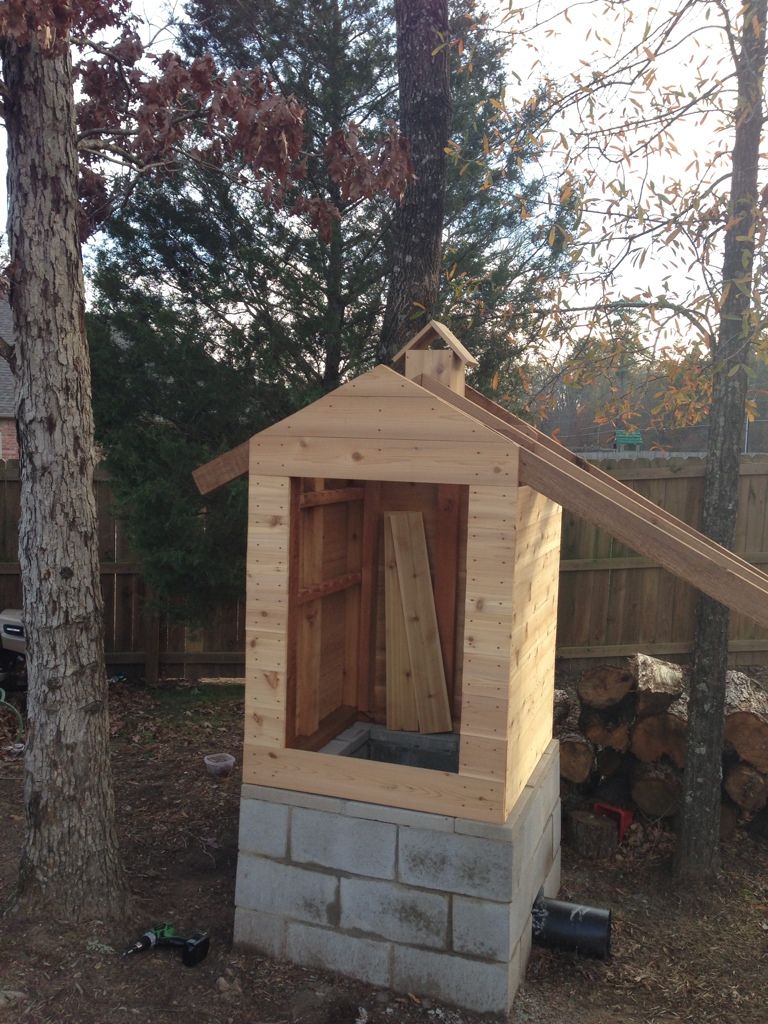
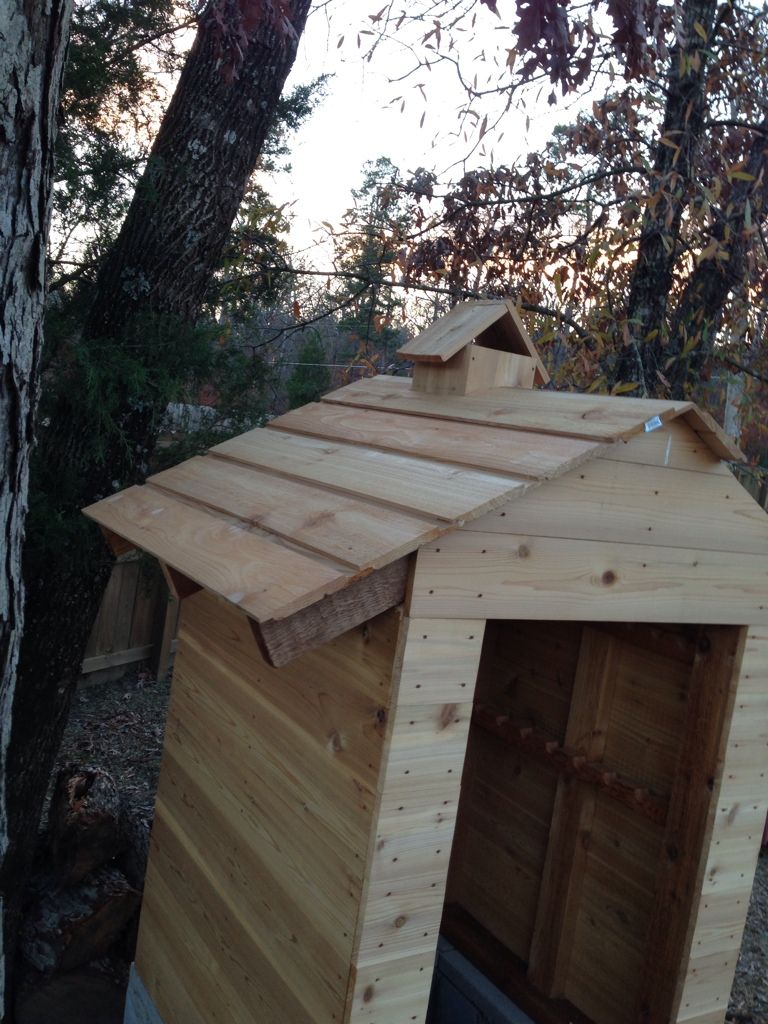
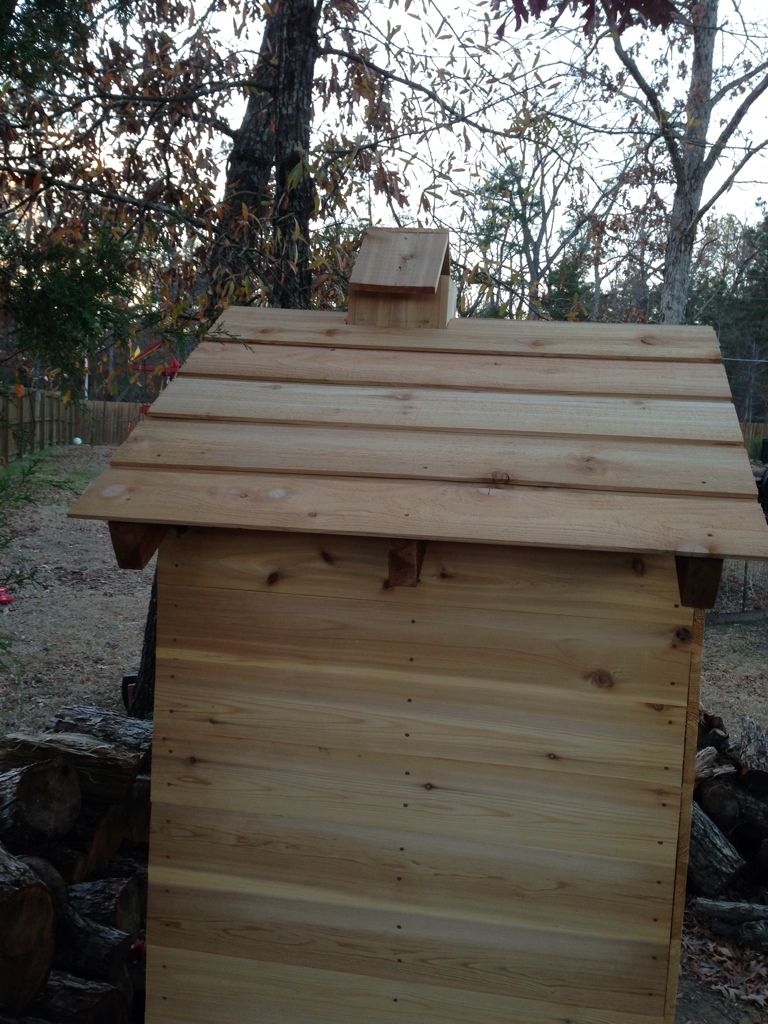
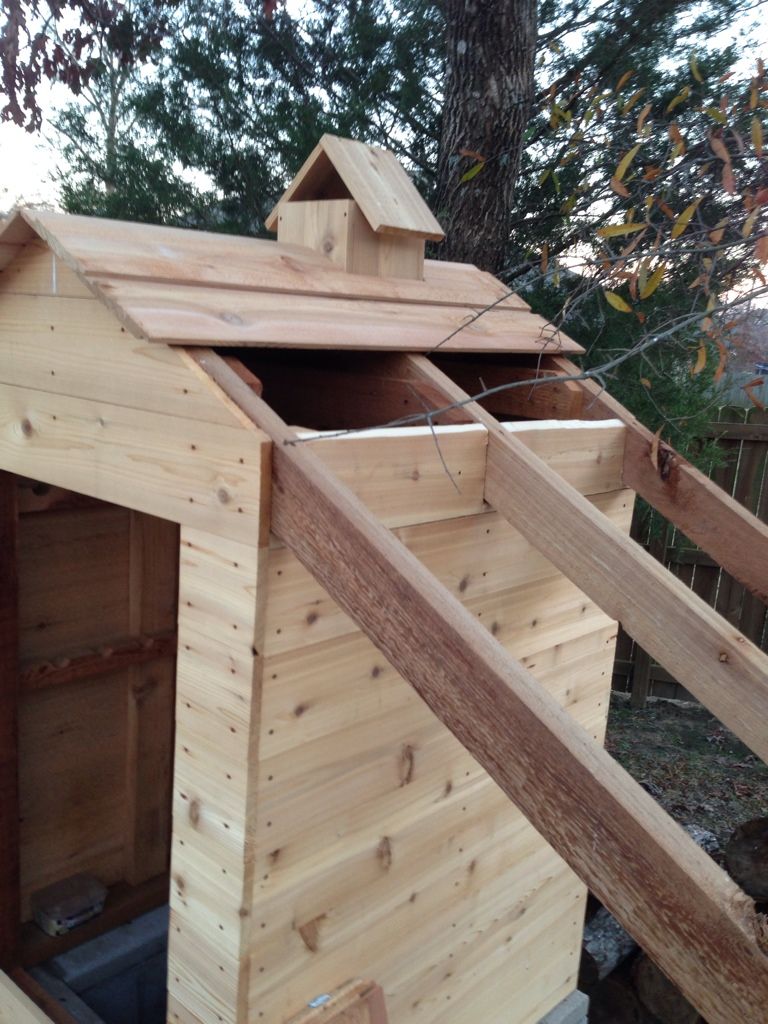
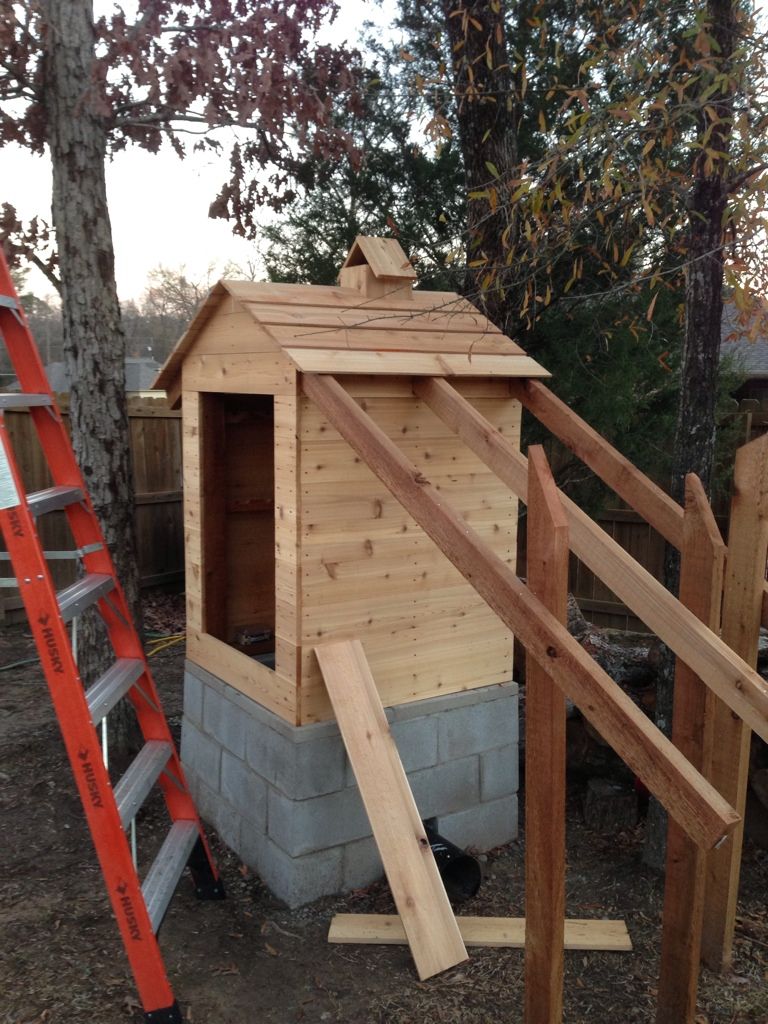
Here are some views of my ongoing project- - Sausage Smoking Done Right. The SSDR project is ongoing, probably costs more than if I had just run over to Cabela's and bought a top-of-the-line one, and is SOOO much more satisfying, because I'm learning a lot about what really makes the sausage making process tick. ...and cut, and burn, and cause all sorts of other flesh wounds. But it sure is fun!
Smoke Generator Conclusions: During the past few months, I`ve been experimenting and reading about smoke generators. I`ve come to a few conclusions:
(a) Chips, sawdust, or whatever the smoking material is, it must get hot enough to combust. A pan of chips on a luke-warm burner will never get there. A pan of chips on a burner of varying hotness will never be controllable. ...so, separate the smoke source from the main heat source, and minimize their interaction.
(b) You can never cold smoke if you generate smoke in the meat cabinet. It gets too hot. Separate the smoke source from...
(c) Some smoke generators use regular fire, some use chips, some use pellets, some use sawdust, some blow air, some have problems with spent ash. Use whatever is dependable. However, consider the cost of your own wood supply versus chips versus special pellets or sawdust.
Having faced those challenges, I came up with my own design. (That way I can spend more money!) What follows is commentary and a few pictures of my smoke generator and how I connect it to my smoker.
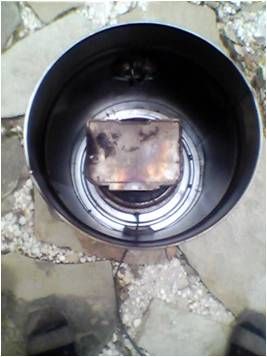
My Generator is a galvanized pail with two holes in it- - an air + power cord inlet and a smoke outlet. I typically use an 1800 watt adjustable hot plate for the heat source, as shown on the left, , but here on the right, it`s set up with a flagstone rock support for a 1750 watt heater element from a Rival "Crock Pot Grill." The same box of chips goes on top of either heater element. Note that the chips have to get pretty hot to support combustion. Doing it this way, I can control the smoke generation rate with the hot plate or heating coil, but can still cool the smoke down by running it through a ten-foot section of aluminum downspout pipe, which connects to the smoker cabinet. This enables me to "cold smoke," even in Texas.
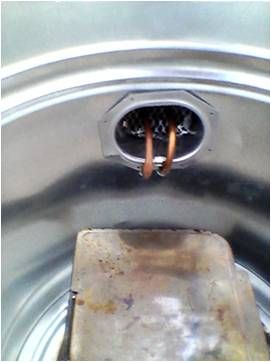
Some of my early efforts to control smoke flow were laughable. After a few experiments and some reading and "pm" exchanges with a couple of forum members, I came up with the following design. The two following shots show detail of the air outlet, which is the heart of the smoke flowrate solution.
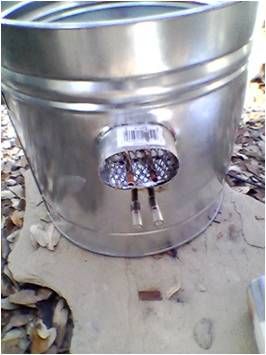
I drilled two holes in the side of the pail, shoved some mesh into the outlet (which is a gutter downspout connector), ran copper tubing in, and bent it back into the outlet mesh for support. Blowing air in with a two-hose aquarium pump serves as motive force to move the smoke through.
Note that this is not a true "venturi" because the air and smoke flow in co-current fashion. In a true venturi, the air would flow through a restriction which produces a low pressure region, and smoke would be drawn in perpendicularly. It`s a fine point, really. If I need to slow down the smoke/air flow rate, I can cut back slightly on the hot plate or heater setting and pull out one of the twin aquarium pump hoses. However, I find this unnecessary in practice. (Translation: everybody would always like a little more smoke.)
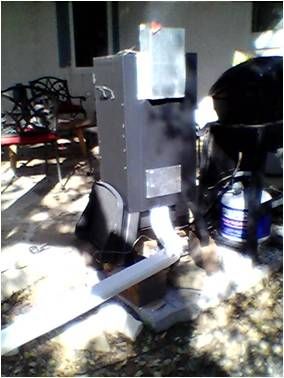
This shot shows how the downspout runs up and into the bottom of the MasterBuilt smoker. I also mounted a sheet metal baffle on the top rear of the cabinet, shown above (over the adjustable vent) to shield the vent from interaction with the wind. Smoke temperature at the elbow into the cabinet bottom typically runs 5 to 10 degrees above ambient. This means that, mid-winter, I hope to smoke some salmon like our friends on the west coast and BC.
Smoker Temperature Control: But now, having generated smoke, I need to control the temperature in the smoker cabinet. Fortunately, good ol` Santa heard my request and dumped a bunch of wire and hardware and whatnot down my chimney, saying "Some Assembly Required! Ho ho ho, Suckah!" as he rode off into the night.
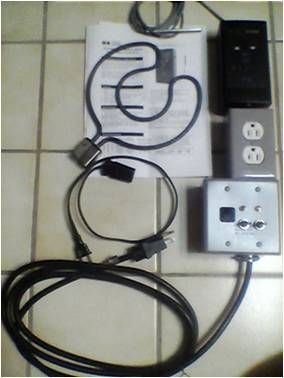
...and here it is, all assembled and smoke-tested and ready to go- - a Control Products Model TC-9102 Surface Mount Temperature Controller (the "black box" in the photo), which I wired up with a switch enclosure and some toggle switches so I can use twin heating elements if I want. This thing has a temperature sensor (coiled at top) which mounts in a representative zone of the smoker cabinet. The model that I bought can switch on or off two heating elements, or could be used for a heating-or-cooling setup (such as a year-round refrigerator/heater curing cabinet), and the relays can each switch 240 volt AC loads up to 30 amps.
...pretty hefty. However, I only wired mine up for use with a total of 15 amps, which means that I`ll be using only the single 1750 watt heating element shown, for now. I could use two smaller ones, for better control, one for base load and one for trim, but that`s later, and only if needed (which I doubt). But just in case, I`ve wired things up so that I could move up the set point on one heating element to the point where, when I max it out, I can toggle it to full on and bring on the second (trim) element for more heat. (Let`s hear it for over-kill!)
And now, the disclaimers... Be sure to follow your own local electric code. I`ve got 14 gauge wire or heavier and 30 amp or better switches in my equipment. Plugs/sockets/etc. restrict me to using 15 amp equipment by design, but just like a household circuit, you could plug enough into this thing to blow a breaker. ...so, don`t.
I`ll write later about "tuning" the controller. In the chemical plants where I worked, and indeed in engineering in general, process controls are a career field unto themselves. Mount the sensor in the wrong place and your control scheme is doomed. Set this type of controller (known affectionately as a "bang-bang controller:" off or on only) with limits too tight and it will fail. Set the limits too loosely and it will never provide steady conditions. ...and an important one- - make sure that it fails with the current OFF.
More adventures later. Mind what Uncle Chuckwagon sez, pardners, and don`t drink too much liquid "cure" while you`re building anything electrical, or the smoke test will send smoke signals to your local fire department. ...and this is not good.
Best holiday wishes from duh Duck.

Smoke Generator Conclusions: During the past few months, I`ve been experimenting and reading about smoke generators. I`ve come to a few conclusions:
(a) Chips, sawdust, or whatever the smoking material is, it must get hot enough to combust. A pan of chips on a luke-warm burner will never get there. A pan of chips on a burner of varying hotness will never be controllable. ...so, separate the smoke source from the main heat source, and minimize their interaction.
(b) You can never cold smoke if you generate smoke in the meat cabinet. It gets too hot. Separate the smoke source from...
(c) Some smoke generators use regular fire, some use chips, some use pellets, some use sawdust, some blow air, some have problems with spent ash. Use whatever is dependable. However, consider the cost of your own wood supply versus chips versus special pellets or sawdust.
Having faced those challenges, I came up with my own design. (That way I can spend more money!) What follows is commentary and a few pictures of my smoke generator and how I connect it to my smoker.
My Generator is a galvanized pail with two holes in it- - an air + power cord inlet and a smoke outlet. I typically use an 1800 watt adjustable hot plate for the heat source, as shown on the left, , but here on the right, it`s set up with a flagstone rock support for a 1750 watt heater element from a Rival "Crock Pot Grill." The same box of chips goes on top of either heater element. Note that the chips have to get pretty hot to support combustion. Doing it this way, I can control the smoke generation rate with the hot plate or heating coil, but can still cool the smoke down by running it through a ten-foot section of aluminum downspout pipe, which connects to the smoker cabinet. This enables me to "cold smoke," even in Texas.
Some of my early efforts to control smoke flow were laughable. After a few experiments and some reading and "pm" exchanges with a couple of forum members, I came up with the following design. The two following shots show detail of the air outlet, which is the heart of the smoke flowrate solution.
I drilled two holes in the side of the pail, shoved some mesh into the outlet (which is a gutter downspout connector), ran copper tubing in, and bent it back into the outlet mesh for support. Blowing air in with a two-hose aquarium pump serves as motive force to move the smoke through.
Note that this is not a true "venturi" because the air and smoke flow in co-current fashion. In a true venturi, the air would flow through a restriction which produces a low pressure region, and smoke would be drawn in perpendicularly. It`s a fine point, really. If I need to slow down the smoke/air flow rate, I can cut back slightly on the hot plate or heater setting and pull out one of the twin aquarium pump hoses. However, I find this unnecessary in practice. (Translation: everybody would always like a little more smoke.)
This shot shows how the downspout runs up and into the bottom of the MasterBuilt smoker. I also mounted a sheet metal baffle on the top rear of the cabinet, shown above (over the adjustable vent) to shield the vent from interaction with the wind. Smoke temperature at the elbow into the cabinet bottom typically runs 5 to 10 degrees above ambient. This means that, mid-winter, I hope to smoke some salmon like our friends on the west coast and BC.
Smoker Temperature Control: But now, having generated smoke, I need to control the temperature in the smoker cabinet. Fortunately, good ol` Santa heard my request and dumped a bunch of wire and hardware and whatnot down my chimney, saying "Some Assembly Required! Ho ho ho, Suckah!" as he rode off into the night.
...and here it is, all assembled and smoke-tested and ready to go- - a Control Products Model TC-9102 Surface Mount Temperature Controller (the "black box" in the photo), which I wired up with a switch enclosure and some toggle switches so I can use twin heating elements if I want. This thing has a temperature sensor (coiled at top) which mounts in a representative zone of the smoker cabinet. The model that I bought can switch on or off two heating elements, or could be used for a heating-or-cooling setup (such as a year-round refrigerator/heater curing cabinet), and the relays can each switch 240 volt AC loads up to 30 amps.
...pretty hefty. However, I only wired mine up for use with a total of 15 amps, which means that I`ll be using only the single 1750 watt heating element shown, for now. I could use two smaller ones, for better control, one for base load and one for trim, but that`s later, and only if needed (which I doubt). But just in case, I`ve wired things up so that I could move up the set point on one heating element to the point where, when I max it out, I can toggle it to full on and bring on the second (trim) element for more heat. (Let`s hear it for over-kill!)
And now, the disclaimers... Be sure to follow your own local electric code. I`ve got 14 gauge wire or heavier and 30 amp or better switches in my equipment. Plugs/sockets/etc. restrict me to using 15 amp equipment by design, but just like a household circuit, you could plug enough into this thing to blow a breaker. ...so, don`t.
I`ll write later about "tuning" the controller. In the chemical plants where I worked, and indeed in engineering in general, process controls are a career field unto themselves. Mount the sensor in the wrong place and your control scheme is doomed. Set this type of controller (known affectionately as a "bang-bang controller:" off or on only) with limits too tight and it will fail. Set the limits too loosely and it will never provide steady conditions. ...and an important one- - make sure that it fails with the current OFF.
More adventures later. Mind what Uncle Chuckwagon sez, pardners, and don`t drink too much liquid "cure" while you`re building anything electrical, or the smoke test will send smoke signals to your local fire department. ...and this is not good.
Best holiday wishes from duh Duck.